Honing your skills in hardening steel at home can be both fulfilling and practical, whether you're working on a major project or simply looking to reinforce your tools. While it might appear daunting for beginners, having a bit of knowledge and some basic tools can lead to impressive outcomes without requiring advanced machinery or extensive experience.
As the UK’s trusted provider of stainless, mild, and galvanized steel, Clickmetal is here to assist you in mastering the art of steel hardening. Follow our step-by-step guide covering heating, quenching, and tempering to ensure your steel achieves the strength and resilience needed for your upcoming projects!
Why Harden Steel?
Steel hardening is a process designed to enhance the metal’s strength and durability, making it more resistant to wear, impacts, and abrasions. It’s particularly beneficial when crafting tools such as knives, chisels, or other items that require a sharp edge. By meticulously controlling the heating, quenching, and tempering stages, you can strike the perfect balance between hardness and toughness, preventing the steel from becoming overly brittle.
Safety First!
Since you’ll be dealing with high temperatures throughout the hardening process, it’s crucial to take appropriate safety measures to safeguard yourself and your environment. Here are some essential safety tips to bear in mind:
- Always wear heat-resistant gloves and safety goggles.
- Ensure your workspace is well-ventilated, especially if you’re using oil for quenching.
- Keep any flammable materials far from your work area.
- Have a fire extinguisher close by, just in case.
- Remember, steel retains heat longer than it seems, so handle quenched pieces cautiously.
What You’ll Need
You don’t need expensive or specialized equipment to harden steel at home. Here’s a list of essential tools to have on hand:
- Steel piece: Stainless, carbon, or mild steel works best.
- Heat source: A propane blowtorch or forge for controlled heating.
- Quenching medium: Water or oil (depending on the steel type).
- Tongs or pliers: For handling the hot steel.
- A sturdy container: To hold your quenching medium.
- Oven (for tempering): To finish the process and reduce brittleness.
- Safety equipment: Heat-resistant gloves, goggles, and protective clothing.
What To Do
Step 1: Prepare the Steel
The initial step is selecting the appropriate type of steel for your project. High-carbon steel is an excellent choice for hardening due to its carbon content, which responds well to heat treatment. Other types can also work, but if you’re unsure which steel suits your project best, don’t hesitate to contact Clickmetal for expert advice.
Once you’ve chosen your steel, ensure it’s clean by removing any rust or debris from its surface, as impurities can interfere with the hardening process.
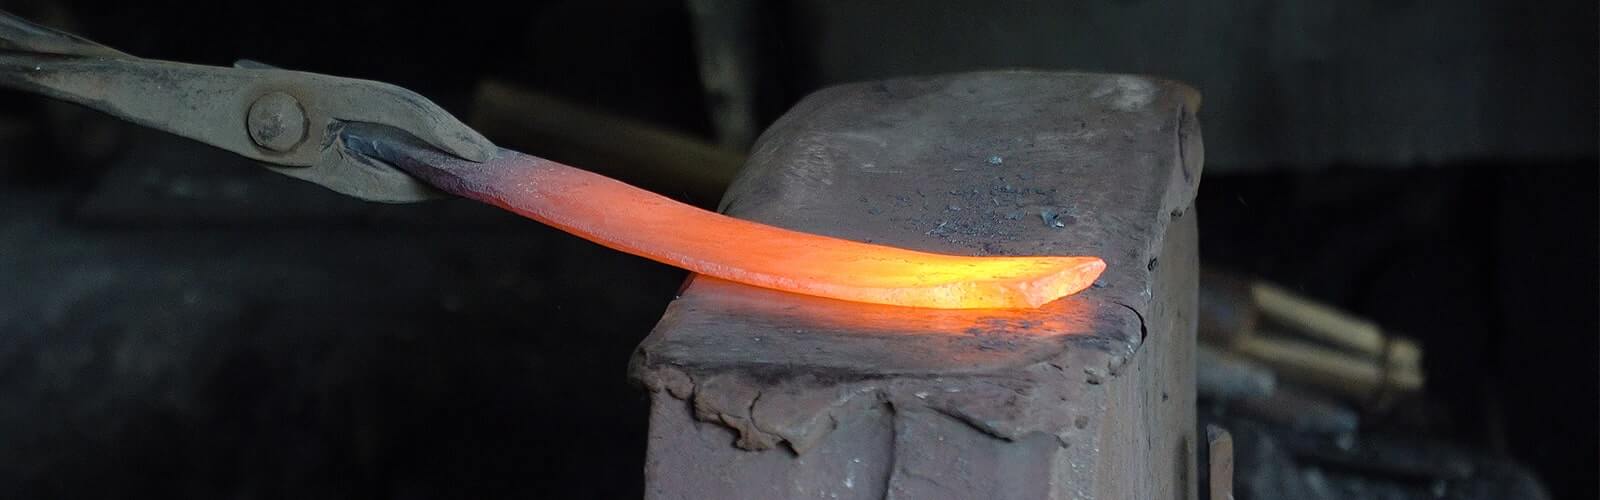
Step 2: Heat the Steel
The next step involves heating the steel to its “critical temperature,†typically between 800°C and 900°C (a bright red glow). You can achieve this using a blowtorch or a small forge. Keep the steel in the flame until it heats evenly and glows red-hot. If you’re new to hardening steel, it’s wise to practice on a small piece of scrap metal to familiarize yourself with the process.
If you’re using a forge, make sure to move the torch or rotate the steel to ensure even heating. A simple way to confirm it’s ready for quenching is by using a magnet. Once the steel reaches its critical temperature, it will lose its magnetic properties, indicating it’s prepared for the next stage.
Step 3: Quenching the Steel
When the steel reaches the correct temperature, it’s time to cool it rapidly through quenching, which solidifies the hardness. The choice of quenching medium depends on the type of steel—water is typically used for mild and carbon steels, whereas certain alloys may require oil. Ensure you quench the steel vertically to avoid warping, and make sure the container is deep enough for complete submersion.
- Water Quenching: Fully immerse the steel in water and quickly cool it down. This rapid cooling ensures effective hardening.
- Oil Quenching: Ideal for more brittle steels, oil cools the metal slightly slower than water, reducing the risk of cracking. However, be cautious—oil can catch fire, so always wear protective gear and use a fire-safe container.
Step 4: Temper the Steel
At this point, your steel will be extremely hard but also quite brittle. To decrease the brittleness while maintaining the hardness, tempering is essential. This involves reheating the steel to a lower temperature (usually between 150°C and 350°C) and allowing it to cool gradually.
- Preheat your oven to the desired tempering temperature.
- Place the steel in the oven for about an hour to alleviate some of the internal stresses caused by quenching.
- After tempering, allow the steel to cool naturally to room temperature.
The precise temperature and duration for tempering will depend on the steel type and the desired balance between hardness and toughness. Higher temperatures make the steel more resilient but less hard, while lower temperatures preserve hardness but may result in reduced flexibility.
Upon tempering, you can verify the steel’s hardness by trying to scratch it with a known hard object, such as a file. If the steel resists scratching, you’ve succeeded!
Shop Premium Steel Components From Clickmetal
Hardened steel opens up countless opportunities for your DIY projects, enabling you to create durable tools, components, or decorative pieces. With the right techniques and safety precautions, hardening steel at home is a feasible process that can be highly gratifying.
If you’re in need of high-quality steel for your next project, Clickmetal offers custom-cut stainless, mild, and galvanized steel, all delivered straight to your door. We aim to process all orders within 3-5 working days, and once ready, they’re shipped via a next-day courier.
Whether you’re a hobbyist or a professional, our extensive range of metals and expert support can help you find precisely what you need. Explore our full selection of metals and kickstart your next project today!
1. Components of piston rod seal:
Polyurethane, polyformaldehyde, rubber
2. Purpose and function of piston rod seal:
The rod seal belongs to the dynamic seal. It is the seal that moves with the piston rod. It is one of the important components on the hydraulic support.
3. Use position of piston rod seal:
Guide sleeve, piston
4. Working principle of piston rod seal:
It is used at the contact part between the guide sleeve and the outer cylinder to seal the emulsion in the outer cylinder.
5. What effects will be caused by improper use or operation of piston rod seal:
1. Improper selection of cavity support material will wear the cavity and piston rod.
2. The size of the friction pair is inappropriate, causing wear.
3. Improper thread guide angle of cylinder barrel and piston end wear the sealing ring.
4. The seal ring is worn due to improper installation guide angle of the seal.
5. The surface of cavity and piston rod is rough, with scratches and worn seals.
6. The outer cylinder leaks and the jack does not maintain pressure.
Piston Rod Seal,Hydraulic Cylinder Rod Seal,Pneumatic Rod Seal,U Ring Seals,Hydraulic Seals
DG Zhongxingshun Sealing Products Factory , https://www.zxs-seal.com