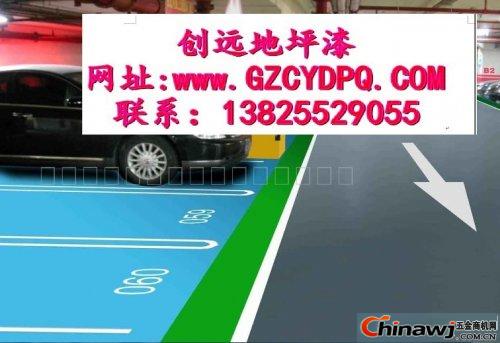
Skilled Chancheng floor paint, Nanhai epoxy floor paint, and Foshan floor paint from Shunde are popular choices for industrial flooring solutions. Sanshui offers additional options for those looking for durable and long-lasting floor coatings. Below is an outline for an epoxy floor paint construction plan: --- ### Step 1: Surface Treatment of the Floor 1. **Curing Time**: Newly completed industrial floors need sufficient curing time, typically around 28 days, before any construction can begin. 2. **Surface Cleaning**: Remove the top layer of cement slurry, old paint, and debris from the surface. 3. **Oil Removal**: Thoroughly clean the surface using a specialized degreaser like the "King Oil Cleaner." 4. **Moisture Control**: Ensure all standing water is removed and allow the surface to dry completely. 5. **Vacuum Cleaning**: Use a dust-free sweeper and vacuum cleaner to ensure the surface is spotlessly clean. 6. **Surface Specifications**: The ideal surface should have a void depth of 2 to 2.5 mm, moisture content below 6%, and a pH range between 6 and 8. 7. **Grinding & Vacuuming**: Finish the surface with a dust-free grinder and vacuum thoroughly to remove any remaining particles. 8. **Putty Application**: Fill any holes or depressions with putty, let it dry, and then sand off the dust. --- ### Step 2: Sealing Coat Application 1. **Sealant Primer**: Apply an epoxy sealing primer on the prepared surface using a high-pressure airless sprayer or roller. 2. **Penetration Enhancement**: Add a small amount of thinner to the primer to improve its penetration into the base layer, enhancing adhesion. Ensure the coating is continuous without interruptions, saturating the surface adequately. 3. **Touch-Ups**: Any missed areas can be brushed manually, and excess primer must be sanded down before moving forward. --- ### Step 3: Putting on the Putty Layers 1. **Two-Coat System**: Apply two layers of putty after the primer has solidified (around 4 hours at 25°C). These layers improve abrasion resistance, pressure tolerance, and overall durability while leveling the surface. 2. **First Layer**: Mix 100-200 mesh quartz sand with epoxy putty and spread evenly. Focus on enhancing wear and compressive strength. 3. **Sand and Vacuum**: Sand the first layer with a dust-free sander and vacuum the surface clean. 4. **Second Layer**: Use 200-270 mesh quartz sand mixed with epoxy putty for smoother application and enhanced flatness. 5. **Final Sanding**: Repeat the sanding and vacuuming process after the second layer dries. Repair any cracks or pockmarks, then flatten with a flat sander. 6. **Adjustments**: The amount of quartz sand used depends on the specific conditions of the floor, determined by the field engineer. --- ### Step 4: Middle Layer Coating 1. **Surface Preparation**: Clean and prepare the putty surface (approximately 20°C, 24 hours). Apply the epoxy floor coating to this layer. 2. **Coating Methods**: Use brushing, batch scraping, or high-pressure airless spraying. Airless spraying at 20-25 MPa is recommended for larger areas. 3. **Defect Detection**: This step ensures the floor is flatter and any existing defects are easily identified and corrected in subsequent layers. 4. **Equipment Installation**: Facilitates甲方’s equipment layout and installation planning. --- ### Step 5: Final Floor Coating 1. **Topcoat Application**: Once the middle layer is dry, apply the final epoxy floor coating. High-pressure airless spraying is preferred over batch scraping. 2. **Preparation**: Sand and vacuum the middle layer with a dust-free sander before applying the topcoat. 3. **Revisions**: If new defects arise due to equipment installation, address these with additional batch scraping, polishing, and vacuuming before spraying the final layer. --- ### Contact Information For inquiries and services, contact our Foshan office at the following details: - **Service Hotline**: 0757-63367966 - **Manager Chen's QQ**: [Insert QQ Number] - **Foshan Office Address**: Tianan Digital City, Nanhai, Foshan - **Guangzhou Headquarters Address**: Haitian Building, Guanghai Building, Zhongshan Road, Tianhe, Guangzhou - **Website**: [www.gzcydpq.com](http://www.gzcydpq.com) - **Additional Links**: - LuLuTong: [www.gzcydpq.3566t.com](http://www.gzcydpq.3566t.com) - Lights Network: [www.shop.denghuo.com/369742](http://www.shop.denghuo.com/369742) - Business Treasure Website: [www.gzcydpq.cn](http://www.gzcydpq.cn) - Electromechanical Home: [www.GZCYDPQ.jdzj.com](http://www.GZCYDPQ.jdzj.com) - International Business Network: [www.gzcydpq.b2bvip.com](http://www.gzcydpq.b2bvip.com) - Chinese Supplier: [www.gzcydpq.cn.china.cn](http://www.gzcydpq.cn.china.cn) ---  This plan outlines a comprehensive approach to achieving a high-quality epoxy floor finish. If you need further assistance or customization, feel free to reach out to our team!
This canless LED recessed light is IC rated, which is permitted to be in contact with insulations in ceilings, meaning the junction box is thermally protected. It only requires as small as 2 inches ceiling spaces, fits various ceilings, and joists. Recessed can is no longer a limitation for your choice.
The unique waterproof male and female connectors make it great for wet locations. The IC rating lets this light be in contact with insulation so you don't need to worry about it overheating and causing a fire.
Ultra-thin body, 5%-100% smooth dimming, compatible with most dimmers, suitable damp location, meets kinds of needs in applications such as kitchen, living room, bedroom, bathroom, workplace, common areas, outside soffits and other hard to reach spaces.
This light fits new construction, remodels, and retrofit installations. The aluminum light body extends the lifespan to 50,000hrs and the light comes backed by a 5-year warranty.
LED Ultra Slim Panel Light,led slim panel light,led slim panel,slim panel
Rhein Lighting Technology Co.,Ltd. , https://www.rheinlighting.com