In this blog, we’re going to walk you through a detailed explanation of HAAS REVO Through-Post Tensioners and provide step-by-step instructions on how to install them. Whether you're a professional installer or a DIY enthusiast, understanding these components is crucial for achieving a polished and secure railing installation.
---
To begin, gather your materials, including the marking template provided by HAAS. Use this template to accurately mark the locations for drilling on each side of your posts. For optimal results, drill halfway from one side of the post and then halfway from the opposite side. This technique prevents splintering as the drill bit exits the post, ensuring a clean finish.
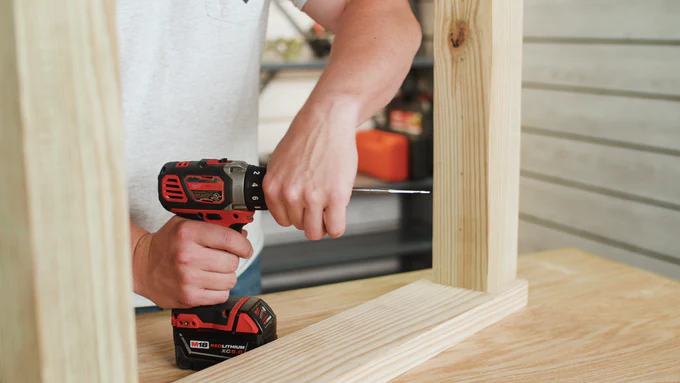
Set your drill to the highest speed setting and align the drill bit with your marked points. Begin drilling until the hole reaches about halfway through the post. Repeat this process for all marked holes on both sides of the post to ensure alignment. After drilling, clear out any leftover sawdust from the holes to avoid interference during assembly.
---
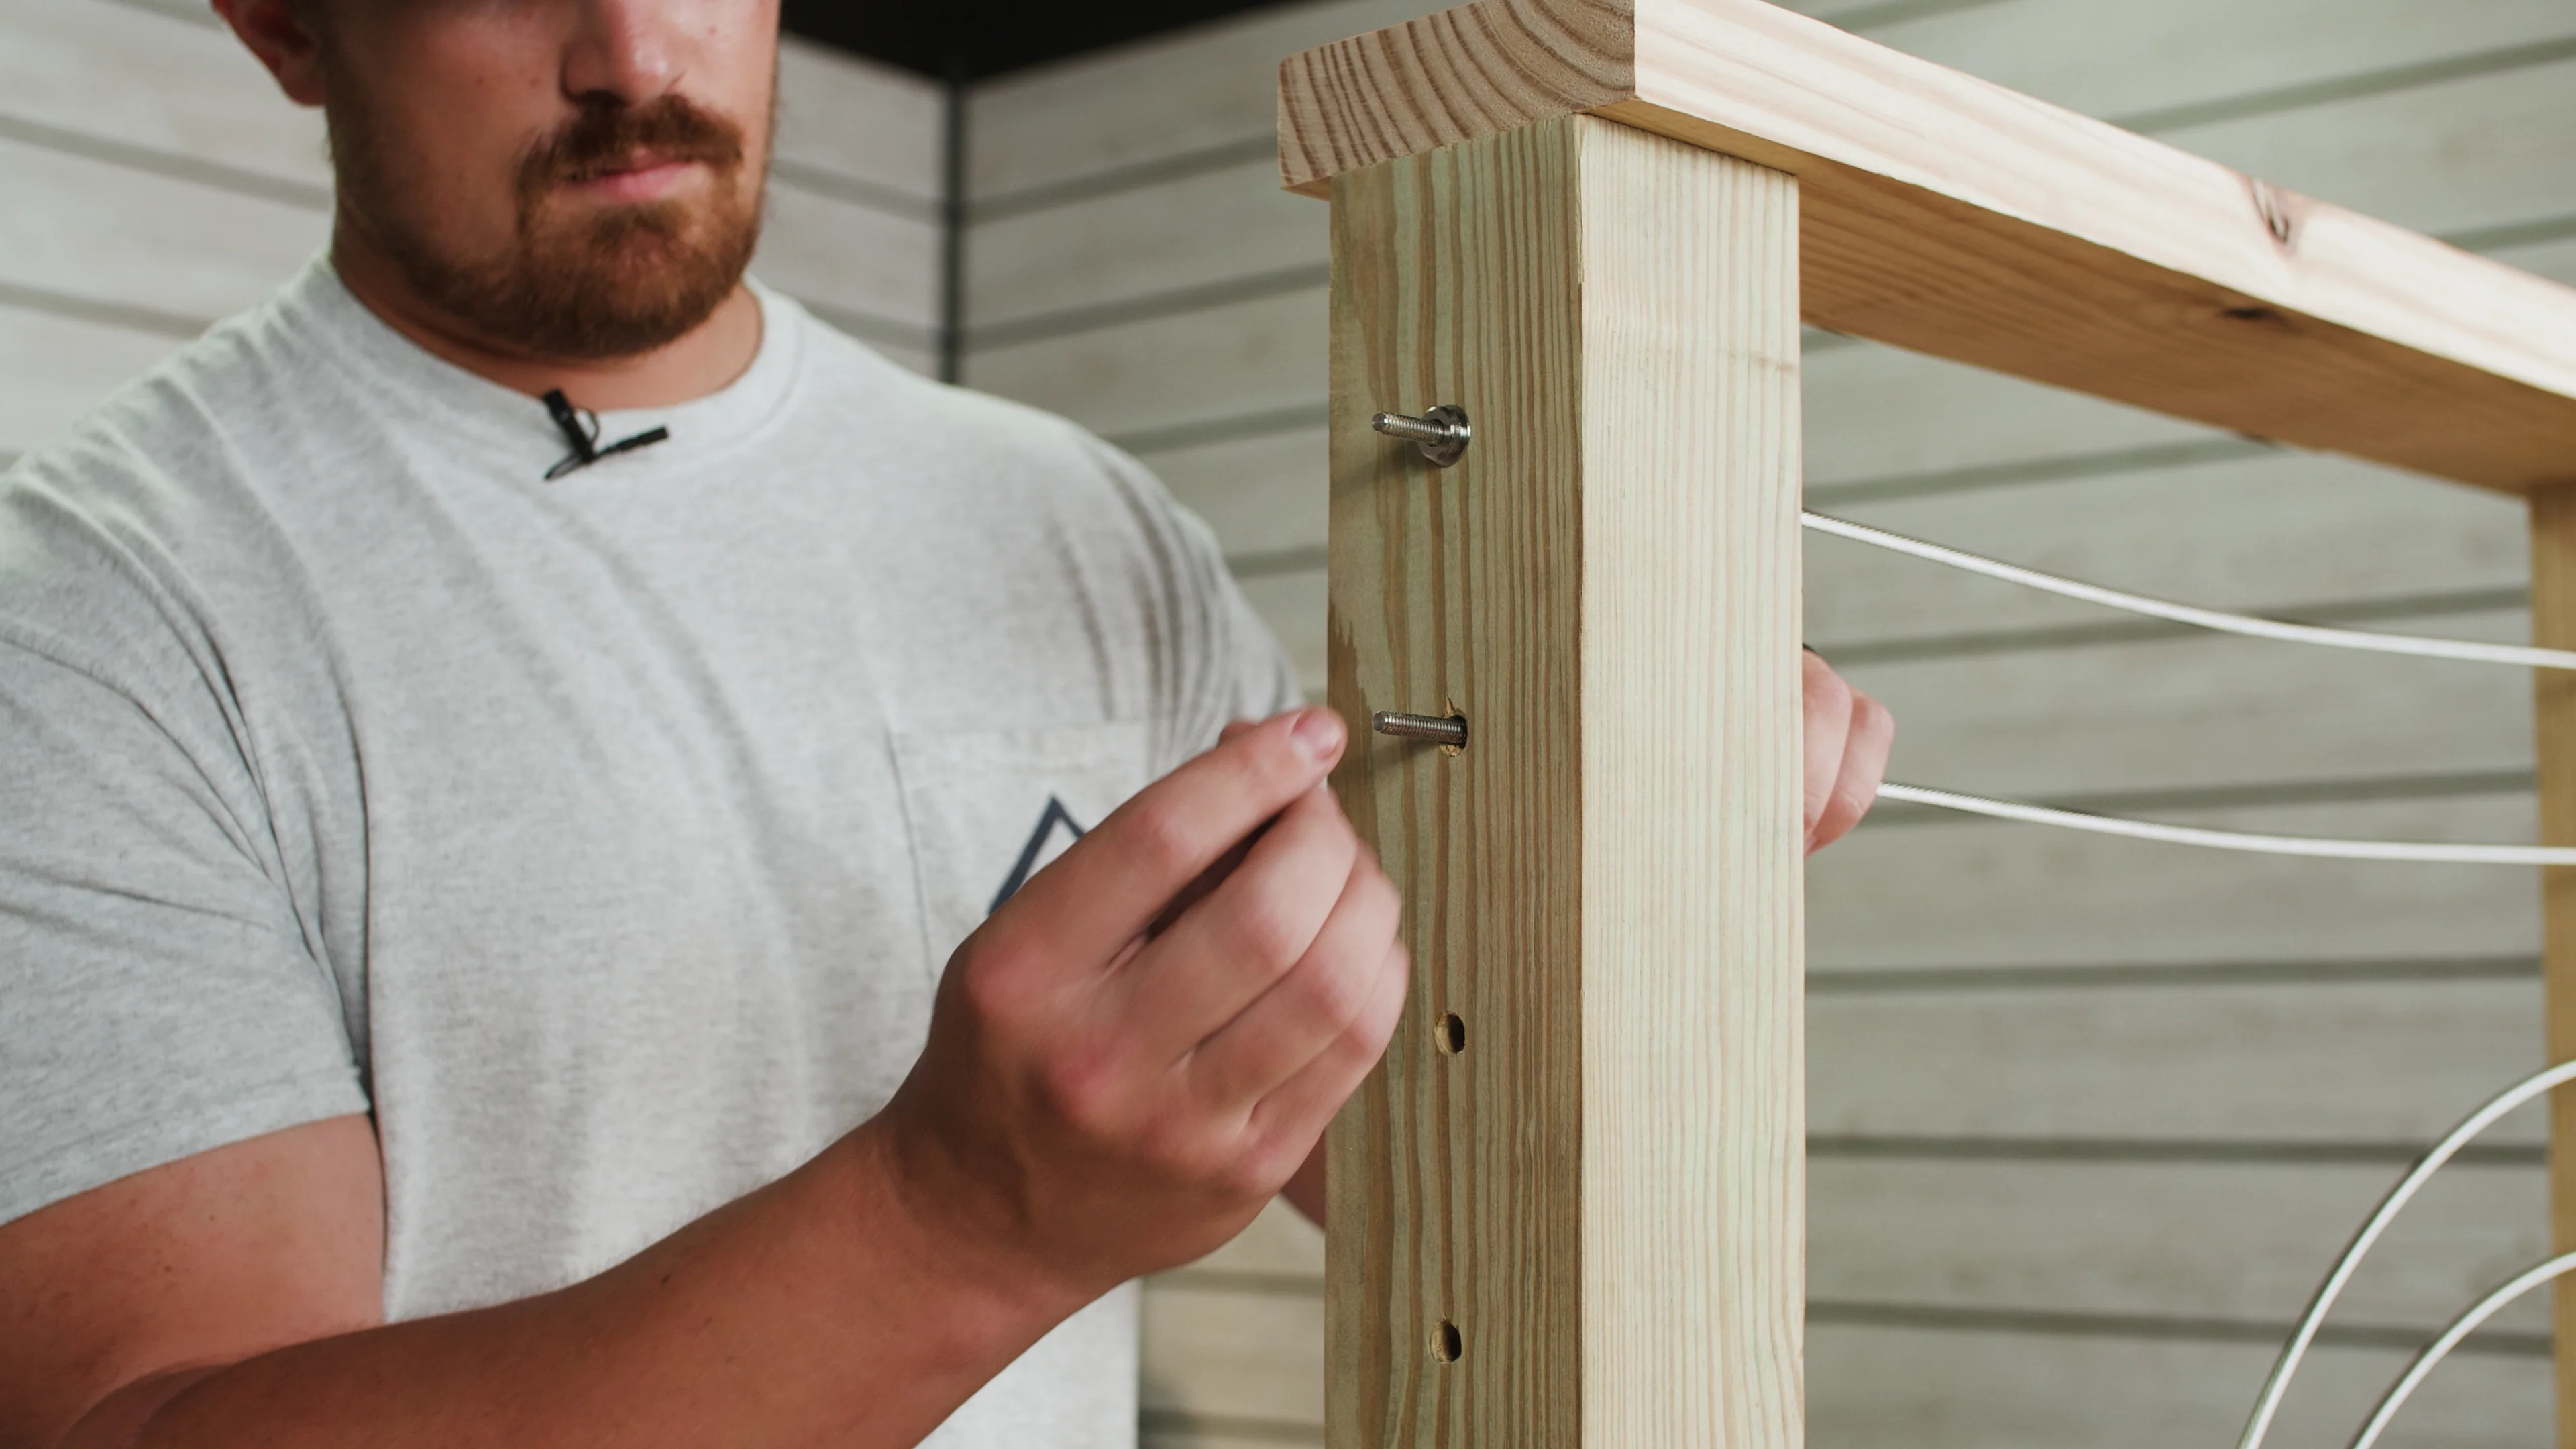
With your holes prepared, it’s time to assemble the HAAS REVO Through-Post Tensioners. Each tensioner consists of four key components: the swage stud, centering bushing, hex nut, and end cap. The swage stud attaches to the cable end, while the centering bushing slides into the mounting hole on the back of the post. The hex nut threads onto the stud and adjusts tension, and the end cap provides a finished appearance.
Trim the cables to the appropriate length for your tensioning fitting. Feed the cable through the post hole and pull it taut from the backside to eliminate slack. Mark the cable at the entrance of the hole, release the tension, and use the swage stud to measure the exact cut length. Trim the cable at the second mark using a cable cutter, repeating the process for all cables in the run.
---
Next, attach the swage studs to the cables. If you're using wood post protectors, slide them onto the cables before inserting the cable ends into the swage cavity of the stud. Ensure proper alignment and use a swaging tool to create two indentations, securing the cable firmly. Once swaged, insert the stud through the post hole and slide the centering bushing onto the stud, positioning it into the mounting hole on the back of the post.
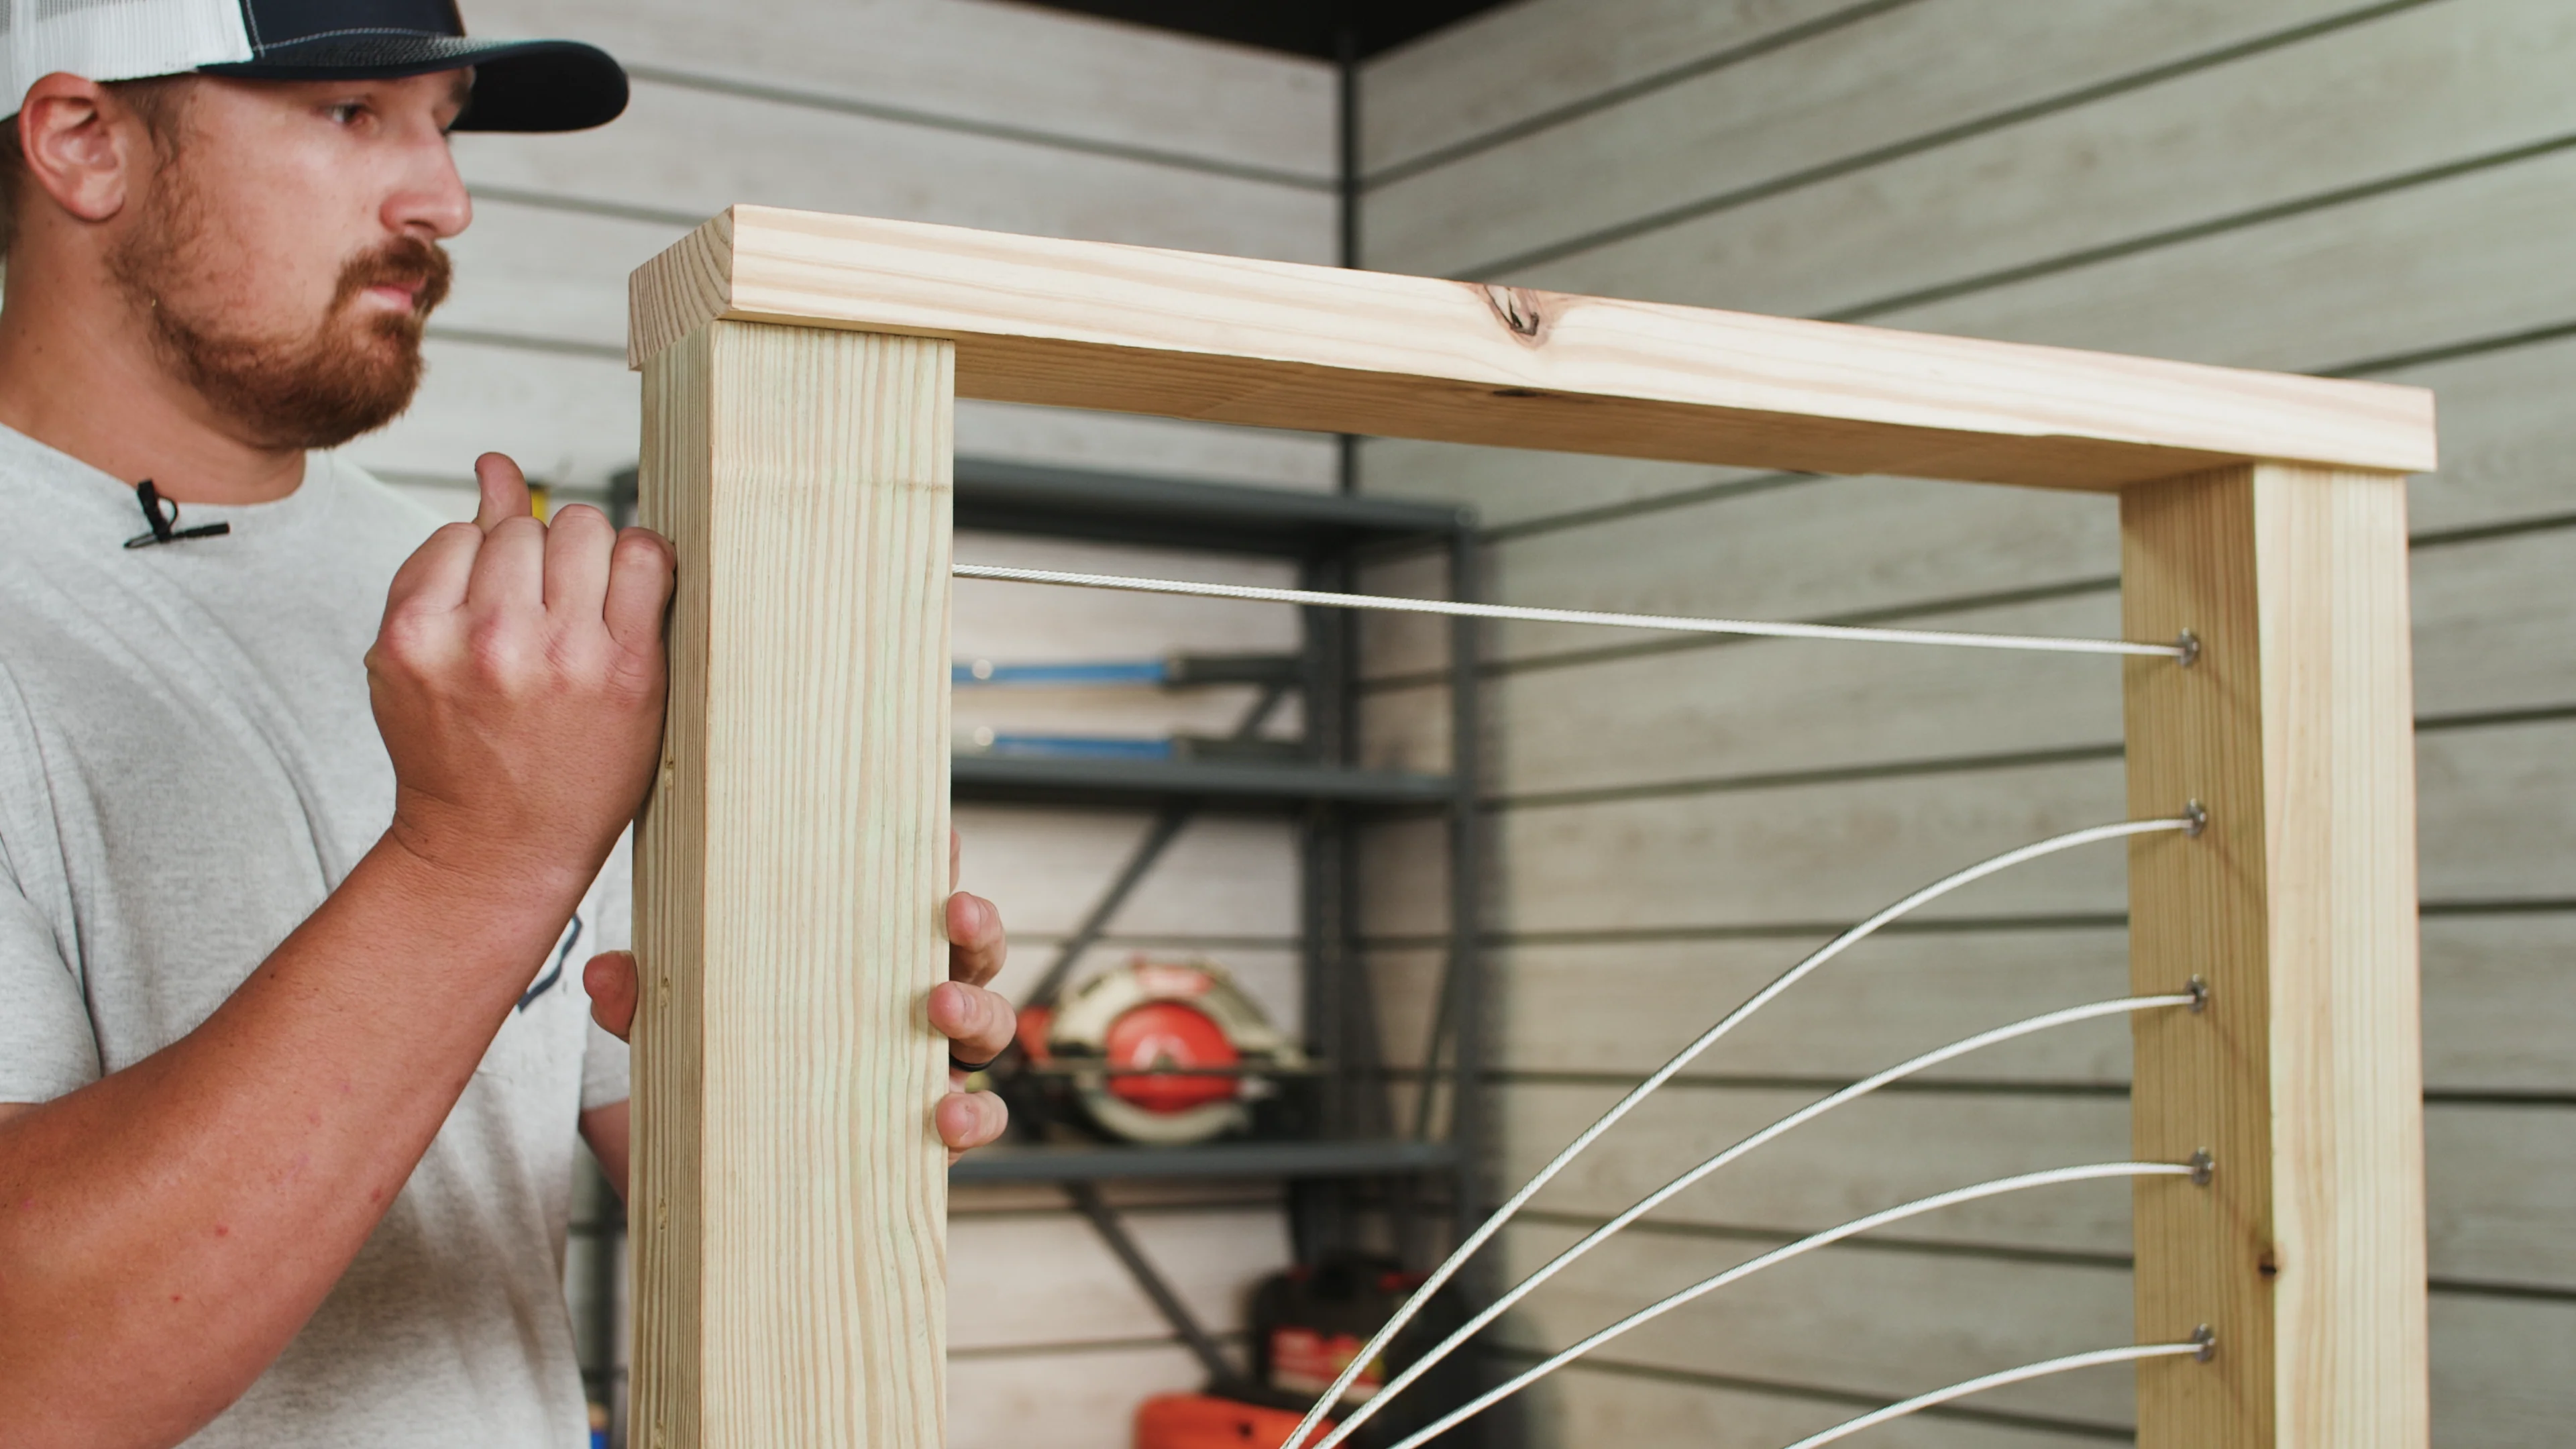
Thread the hex nut onto the stud and tighten it by hand. Repeat this process for all cables in the run. To achieve uniform tension across the entire railing system, follow a specific sequence: start with the middle cable, then alternate between the top and bottom cables as you work outward. Count the number of half-rotations required to tension each cable and maintain consistency throughout the run.
---
For the final step, use a 7/16†ratcheting wrench and vise-grips to complete the tensioning process. Clamp the vise-grips onto the stud to prevent twisting while tightening the hex nut. Begin at the 12 o’clock position and count your half-rotations, ensuring all cables reach equal tension. Once completed, use an angle grinder to trim the excess threads of the stud, ensuring they are flush with the hex nut.
Finally, thread the end caps onto the bushings to conceal the hardware and give your railing a polished finish. With the end caps securely in place, your installation is complete.
---
This thorough process ensures a durable and visually appealing railing system. If you encounter any challenges or have questions about specific steps, feel free to reach out to HAAS support or consult additional resources such as the HAAS Stainless REVO Standard and Low-Profile End Stops guides.
We hope this guide has been helpful and informative. Happy installing!
CNC Machined Components are mainly in six axle lathe with sticks of metal materials finished, such as variety of high precision and quality of electronic, computer precise components, communication components, automotive parts and accessories, machinery parts, sanitation hardware parts, optics precise parts, medical appliances, pneumatic tools accessories. We are very strict with our CNC machined components through the finished production is continuously improvement and growth, we will give you the best quality and services about our CNC machining products.
Cnc Machined Components,Custom Machining Part,Precision Cnc Components,Cnc Components
Stand Dragon Industrial Co., Ltd. , https://www.standdragontw.com