Resistance strain gauge load cell principle
Â
The resistance strain gauge load cell operates on the principle that when an external force is applied, the elastic body (also known as the sensitive beam or elastic element) undergoes elastic deformation. This deformation causes the strain gauge, which is attached to its surface, to also deform. As a result, the resistance of the strain gauge changes—either increasing or decreasing. The change in resistance is then converted into an electrical signal (voltage or current) by a measurement circuit, effectively transforming the external force into an electrical output.
It's clear that the strain gauge, the elastic body, and the detection circuit are all essential components of a resistance strain gauge load cell. Below, we will briefly explore each of these elements in more detail.
First, the resistance strain gauge
A strain gauge is essentially a resistor wire arranged on a substrate made of an organic material. It is a key component in measuring mechanical deformation. One important parameter associated with a strain gauge is its sensitivity coefficient, denoted as K. Let's take a closer look at what this means.
Consider a metal resistance wire with length L and a circular cross-section of radius r, where the area is S and the resistivity is Ï. The Poisson’s ratio of the material is μ. When no external force is applied, the resistance R of the wire is given by:
R = ÏL/S (Ω) (2–1)
When a force F is applied, the wire elongates by ΔL, and its cross-sectional area decreases by ΔS. Additionally, experiments show that the resistivity of the wire also changes slightly, denoted as ΔÏ.
To determine how much the resistance changes when the wire is stretched, we can take the total derivative of equation (2–1):
ΔR = ΔÏL/S + ÏΔL/S – ÏΔS/L² (2–2)
By substituting equation (2–1) into equation (2–2), we get:
ΔR/R = ΔÏ/Ï + ΔL/L – ΔS/S (2–3)
Since the cross-sectional area S = πr², we can express ΔS as 2πrΔr, so:
ΔS/S = 2Δr/r (2–4)
From material mechanics, we know that:
Δr/r = -μΔL/L (2–5)
Substituting equations (2–4) and (2–5) into (2–3), we get:
ΔR/R = ΔÏ/Ï + ΔL/L + 2μΔL/L
= (1 + 2μ)(ΔÏ/Ï)/(ΔL/L) * ΔL/L
= K * ΔL/L (2–6)
Where:
K = 1 + 2μ + (ΔÏ/Ï)/(ΔL/L) (2–7)
Equation (2–6) shows the relationship between the relative change in resistance and the relative change in length of the strain gauge. It should be noted that the sensitivity coefficient K is a constant determined by the properties of the metal used in the resistance wire. It does not depend on the shape or size of the strain gauge. The value of K varies depending on the material, typically ranging from 2 to 5. K is a dimensionless quantity, meaning it has no units.
In material mechanics, ΔL/L is called strain, often denoted as ε. It is commonly expressed in microstrain (με), where 1 με equals one millionth of a unit. Therefore, equation (2–6) is often written as:
ΔR/R = Kε (2–8)
Second, the elastomer
The elastomer is a specially shaped structural component that serves two main functions. First, it supports the external force acting on the load cell, generating a reaction force to maintain static equilibrium. Second, it creates a high-quality strain field in the region where the strain gauges are mounted, making it ideal for converting mechanical strain into an electrical signal.
Take the elastomer of the Toledo SB series load cell as an example. It features a cuboid cantilever beam with a bore. At the center of the bottom, pure shear stress occurs, while tensile and compressive stresses appear on the top and bottom surfaces. The principal stress directions are opposite—one pulling and the other compressing. If strain gauges are placed here, the upper half will stretch, increasing resistance, while the lower half will compress, decreasing resistance.
The strain at the center of the bottom of the beam is given by:
ε = [3Q(1+μ)/2Eb] * [(B(H²-h²)+bh²)/(B(H³-h³)+bh³)] (2–9)
Where: Q – Shear force on the section; E – Young’s modulus; μ – Poisson’s ratio; B, b, H, h – Geometrical dimensions of the beam.
Note that the stress states discussed above are local conditions, while the actual strain gauges experience an average state.
Third, the detection circuit
The detection circuit's role is to convert the resistance change of the strain gauge into a voltage output. The Wheatstone bridge is widely used in load cells due to its advantages, such as suppressing temperature effects, reducing lateral interference, and simplifying compensation problems.
Because the full-bridge equal-arm configuration offers the highest sensitivity and easily cancels out disturbances, most load cells use this design.
During the measurement process, the weight is applied to the load cell’s elastomer, causing it to deform elastically. The strain gauges mounted on the elastomer detect this deformation (tensile or compressive) and convert it into an electrical signal. A simple curved beam load cell may have only one strain gauge, but in practice, the elastomer and strain gauges are often combined with protective elements like housings or sealing components to ensure long-term stability and accuracy.

Enclosure: Weighing cabinets create a contained environment around the weighing balance, preventing hazardous materials from escaping into the laboratory.
Ventilation: Most weighing cabinets are equipped with ventilation systems that draw air into the cabinet, filter it, and exhaust it to the outside or recirculate it within the cabinet. This helps to maintain a safe and clean working environment.
Safety glass: The front panel of a weighing cabinet is typically made of safety glass to provide visibility while protecting the operator from potential hazards.
Ergonomic design: Weighing cabinets are designed to be comfortable and easy to use, with features such as adjustable height and tilt.
Built-in features: Some weighing cabinets may have additional features, such as built-in lighting, power outlets, and storage compartments.
Benefits:
Safety: Weighing cabinets protect the operator and the laboratory environment from exposure to hazardous materials.
Accuracy: The controlled environment within a weighing cabinet can help to ensure accurate and precise weighing results.
Compliance: Weighing cabinets are often required to comply with safety regulations and standards in industries such as pharmaceuticals, chemicals, and research.
Efficiency: By providing a dedicated space for weighing operations, weighing cabinets can improve efficiency and productivity in the laboratory.
Applications:
Pharmaceutical industry: Weighing cabinets are essential for handling and measuring pharmaceutical ingredients, ensuring product quality and safety.
Chemical laboratories: These cabinets are used for weighing chemicals and other hazardous substances in research and development settings.
Research laboratories: Weighing cabinets are valuable tools for scientists conducting various experiments and analyses.
Quality control: In industries where precision weighing is critical, such as food and beverage manufacturing, weighing cabinets are used for quality control purposes.
Types of Weighing Cabinets:
Standard weighing cabinets: These are general-purpose cabinets suitable for a wide range of applications.
Powder weighing cabinets: Designed specifically for handling powders, these cabinets often have specialized ventilation systems to prevent the spread of airborne particles.
Hazardous substance weighing cabinets: These cabinets are equipped with advanced safety features to protect operators from exposure to highly toxic or hazardous substances.
Factors to Consider When Choosing a Weighing Cabinet:
Safety requirements: Consider the specific hazards associated with the materials you will be handling and choose a cabinet that meets the appropriate safety standards.
Ventilation system: Evaluate the ventilation system to ensure it is adequate for your needs and complies with relevant regulations.
Size and capacity: Select a cabinet that is large enough to accommodate your weighing equipment and the materials you will be handling.
Ergonomics: Ensure that the cabinet's design is comfortable and ergonomic for the operator.
Additional features: Consider any additional features that may be beneficial, such as built-in lighting or power outlets.
By investing in a high-quality weighing cabinet, you can create a safe and controlled environment for your precision weighing operations, ensuring accurate results and protecting the health and safety of laboratory personnel.
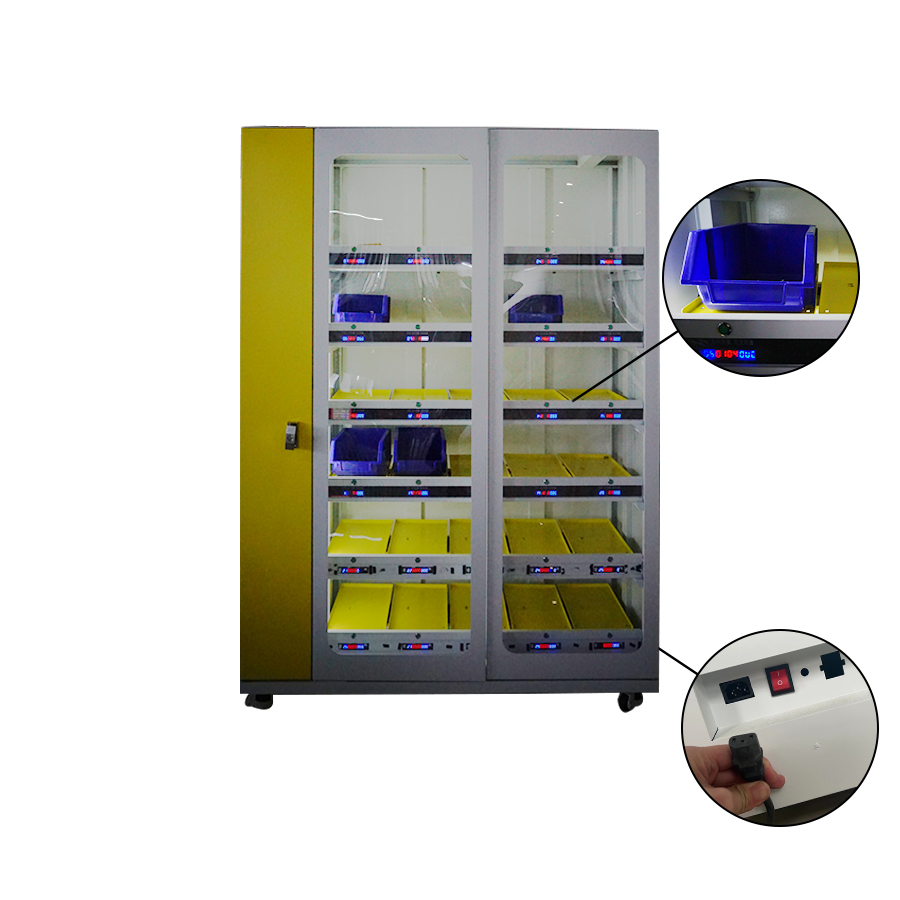
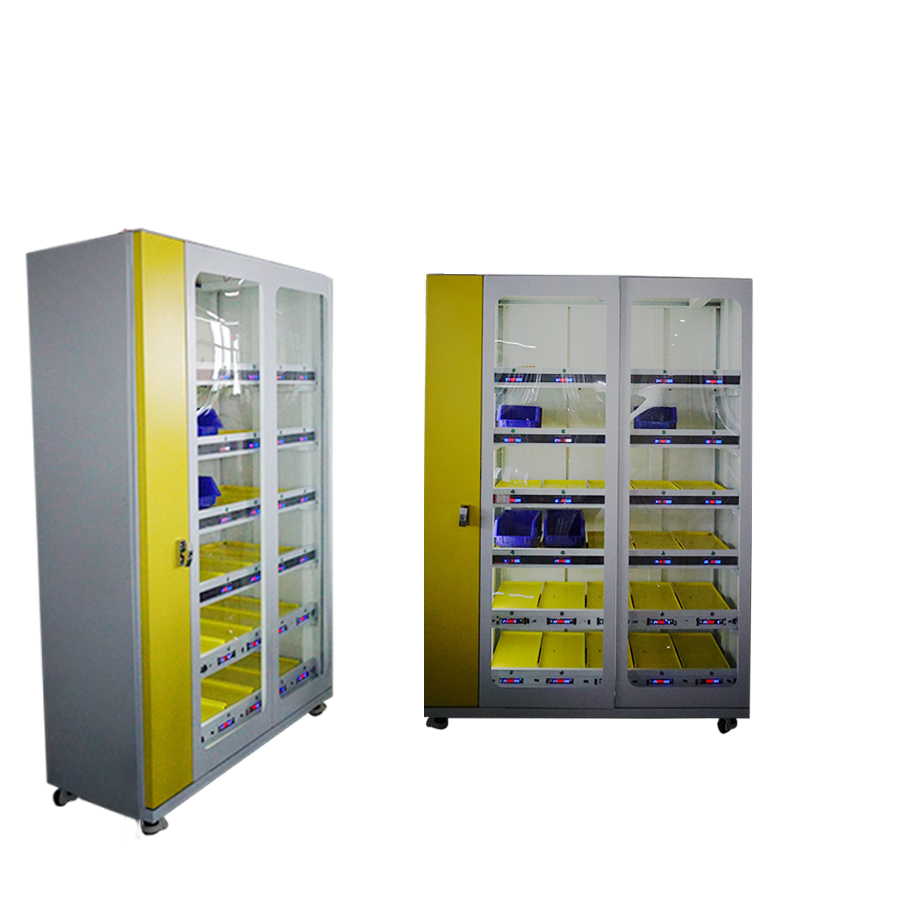
Product color: White yellow (customizable)
Capacity: 30 scales
Freight lane type: 6 floors * 5 lanes
Weighing sensor: A single weighing position can weigh up to 20 kg, a small weighing capacity of 5g, and an error of 1gram
Applicable system: optional card swiping, facial recognition, and fingerprint recognition
Power supply: AC220V/50HZ


tool tracking, hazardous materials, precision weighing
Jiangsu Xicang Intelligent Technology Co., Ltd. , https://www.xciwarehousing.com